
 Pin it
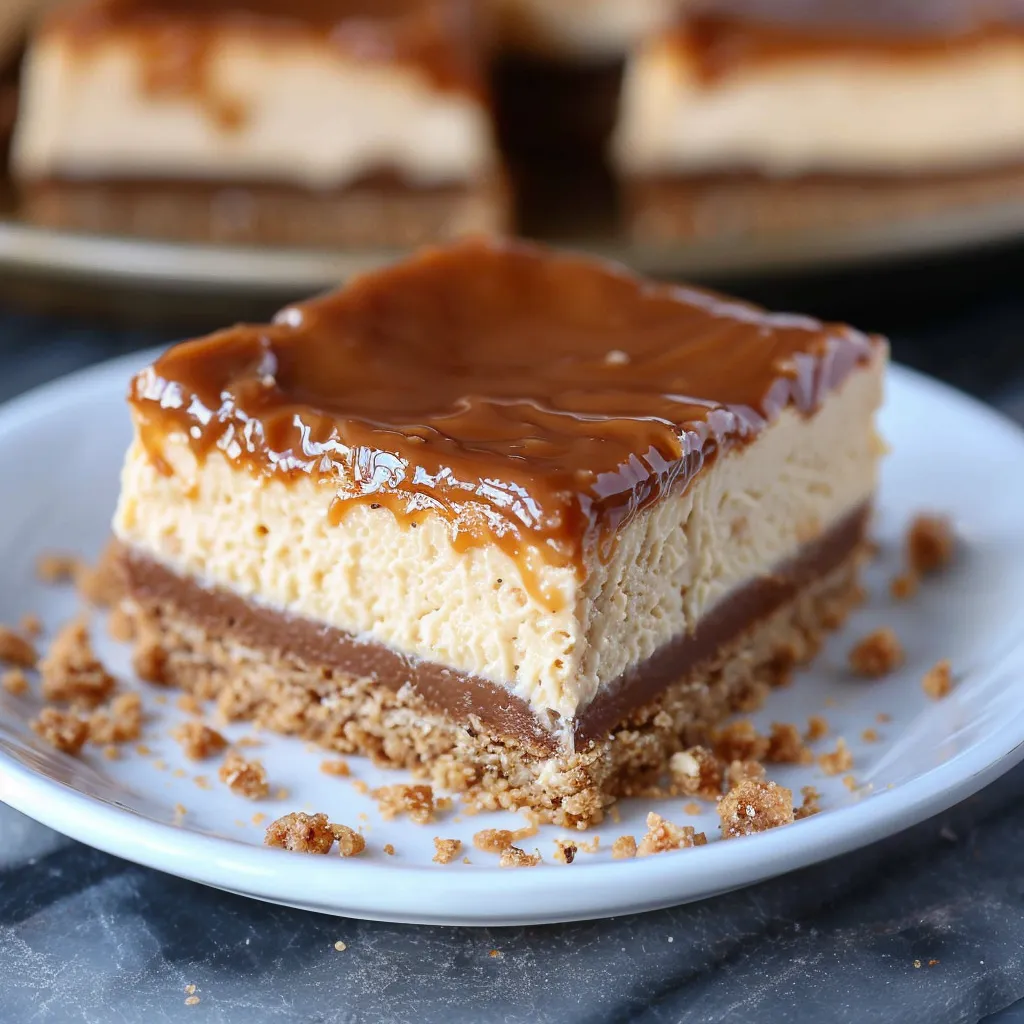
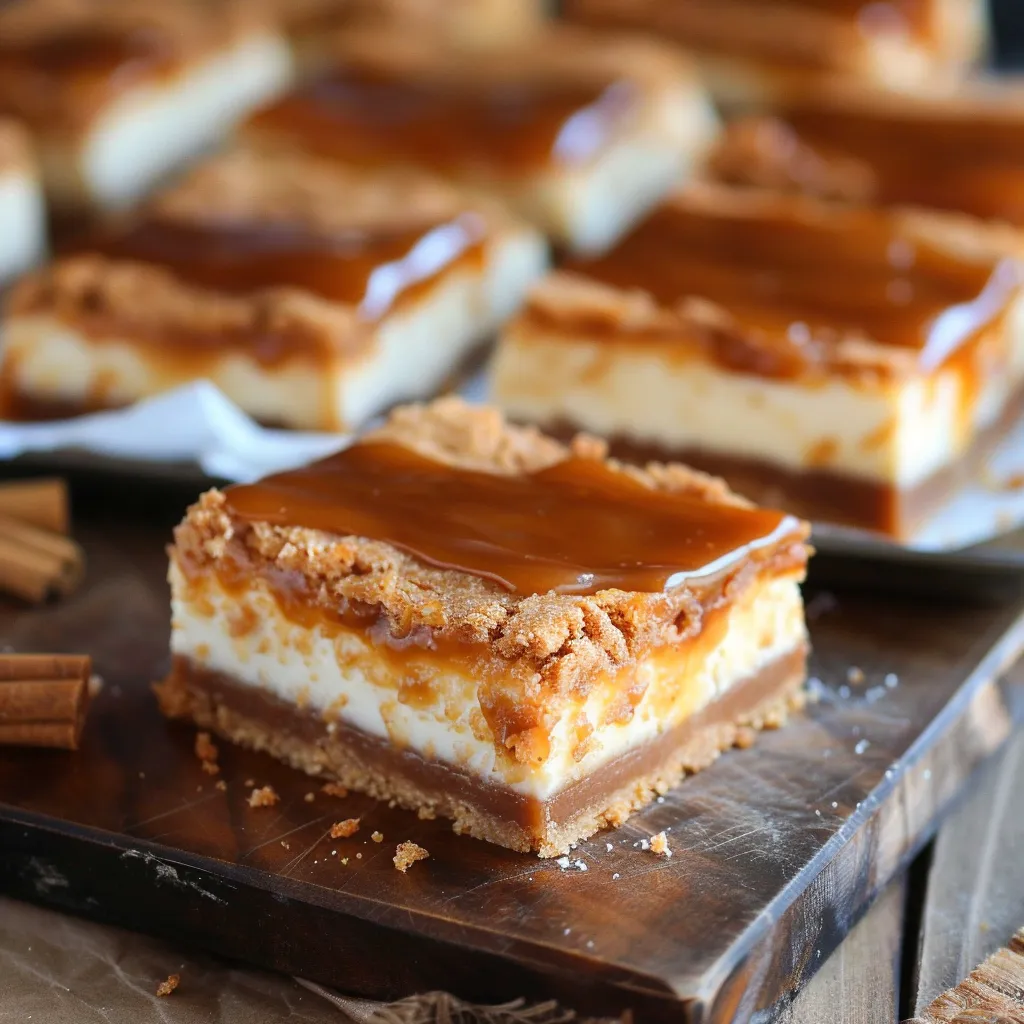
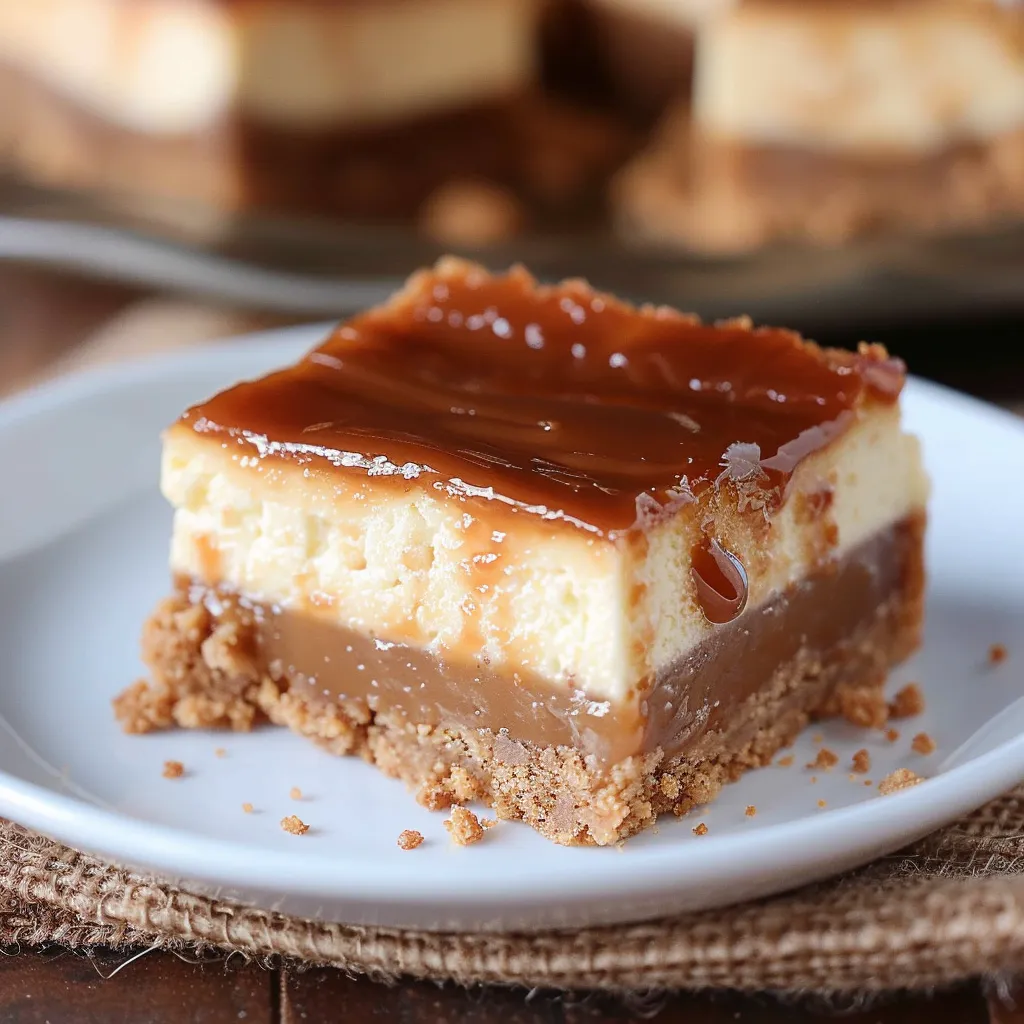
The magical mix of velvety cheesecake and caramel-like dulce de leche makes these bars absolutely addictive with each mouthwatering bite. These treats give you all the yumminess of traditional cheesecake but come together way easier—no tricky water baths or finicky baking methods needed. I've taken them to so many parties and they're always gone in seconds, with folks begging me to share how I made them.
After bringing these to my kid's school staff appreciation event, I got tracked down by the algebra teacher who wanted the instructions ASAP. Since then, I've gotten calls from three different parents telling me they whipped these up for their family events too.
Key Components
- Graham crackers: Go for ones with good honey flavor to work with those caramel notes. The Honey Maid ones always turn out great for me.
- Cream cheese: I always grab Philadelphia for the smoothest result. Make sure it sits out for at least an hour so it's truly soft—this stops any lumps from forming.
- Dulce de leche: This ingredient transforms ordinary bars into something unforgettable. The ready-made Nestle La Lechera works great, though making your own gives even richer flavor.
- Ground cinnamon: Just a tiny bit boosts those caramel flavors without taking over. Ceylon cinnamon works best with its gentle, layered taste.
- Pure vanilla extract: Skip the imitation stuff—real vanilla makes the end result taste so much better.
 Pin it
Step-by-Step Process
- Building The Base
- Grind graham crackers in food processor until fine. Slowly add melted butter until the mix looks like damp sand. Pat firmly into a lined 9x13 pan using a measuring cup's flat bottom. Make sure it's even with slightly higher edges. Bake about 10 minutes until it smells good and starts darkening slightly.
- Creating Creamy Mixture
- Whip cream cheese by itself until smooth. Clean the bowl sides before adding anything new. Mix with sugar until it's airy and light. Add dulce de leche bit by bit, mixing completely each time. Drop in eggs one at a time on low, mixing just enough to blend. Stop often to scrape the bowl.
- Easy Baking Approach
- Pour your mixture over the warm base. Tap the pan lightly to get rid of bubbles. Bake until the edges set but middle still jiggles slightly. Start checking early since baking too long ruins the creamy texture. Let it cool completely at room temp.
- Finishing Touch
- Warm some extra dulce de leche until it's just pourable. Drizzle over the cooled cheesecake. Spread evenly using a flat spatula. Chill in fridge at least 4 hours until fully set.
My first shot at making these taught me you can't rush cooling time. When I hurried this step, my topping ended up a sloppy mess that never properly firmed up.
Impressive Do-Ahead Treat
You can keep these bars in your fridge for up to three days without losing quality, which makes party planning so much easier.
Slicing Like A Pro
For the prettiest slices, warm a sharp knife in hot water, dry it off, and cut down in one smooth motion. Wipe and rewarm your knife between each slice.
This dessert has become my go-to specialty—the one everyone asks for by name. The mix of buttery base, smooth cheesecake middle, and gooey dulce de leche creates such a wonderful combo of tastes and textures that works for fancy occasions but isn't too complicated for regular days when you want something special.
 Pin it
Frequently Asked Questions
- → What exactly is dulce de leche?
- It's a thick, sweet caramel sauce made by heating sweetened condensed milk until it turns rich and golden.
- → Can these bars be prepped in advance?
- Totally! Make them 1-2 days early and chill in the fridge.
- → When do I know the bars are done baking?
- Look for puffed-up edges while the center is soft but not wobbly.
- → Can these cheesecake bars be frozen?
- Yep, they'll keep in the freezer for up to 3 months. Just thaw them in the fridge before serving.
- → Where do I buy dulce de leche?
- Check your grocery store's baking aisle or the international foods section for canned dulce de leche.