
 Pin it
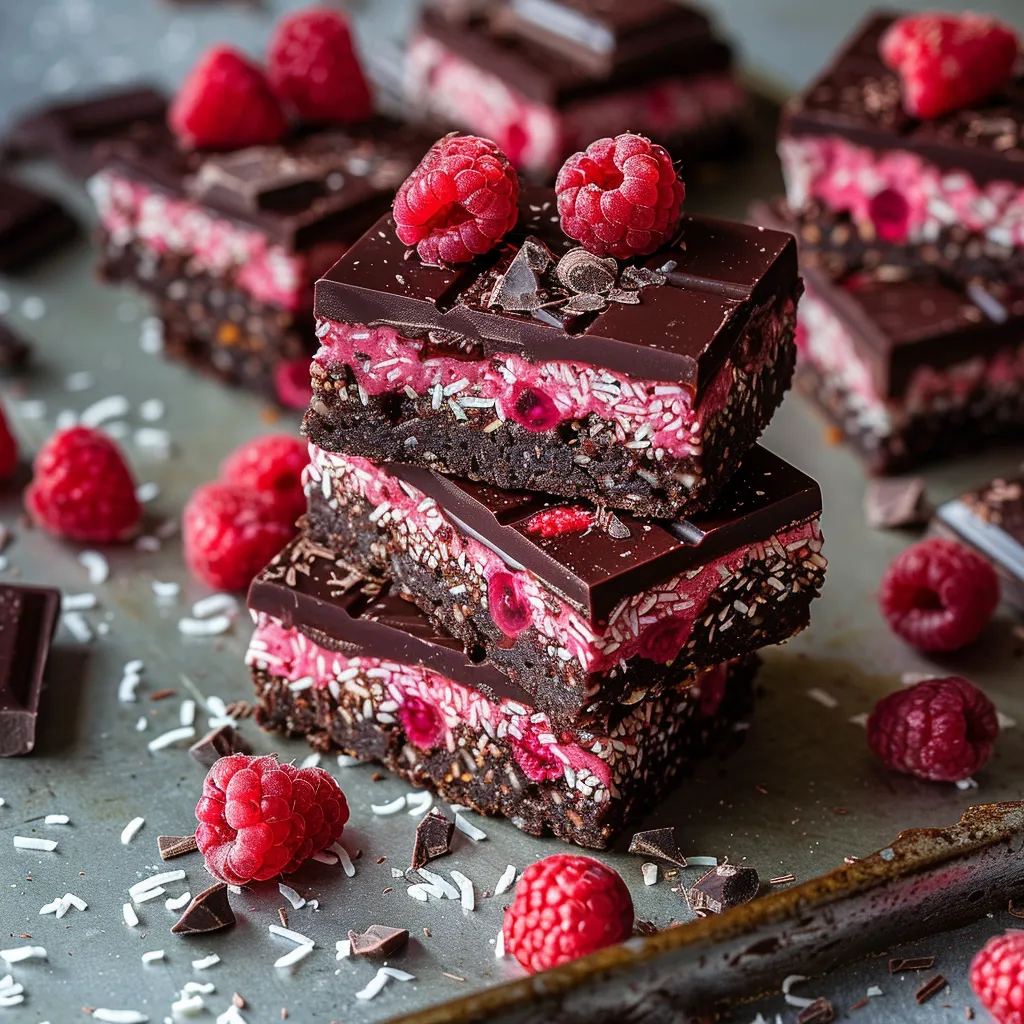
One taste of these Chocolate Raspberry Coconut Slices unleashes a mind-blowing mix of deep chocolate, zesty berries, and sweet coconut that'll wow your taste buds. I've made these mouthwatering no-bake goodies my favorite sweet treat when hosting pals with different food needs – the scrumptious layers will please even hardcore dessert lovers while staying totally vegan and gluten-free.
Key Ingredients
- Medjool Dates: They bring a natural toffee-like taste and chewy feel that makes our brownie base amazing. Go for juicy, shiny ones that feel squishy when you press them.
- Fresh Raspberries: Their tangy zip balances the richness perfectly. Fresh ones pack the most punch, but you can use frozen in a pinch.
- Desiccated Coconut: Its tiny bits help make a smoother filling than the longer shredded stuff. Pick unsweetened so you can tweak the sweetness yourself.
- Coconut Cream: This gives that dreamy, melty texture that makes these bars so good. Try to find one without extra stuff for the best results.
- Dark Chocolate: More cacao means less sweet and more intense flavor on top. Around 70% cacao hits that sweet spot of yummy richness.
 Pin it
Step-by-Step Guide
- Making Your Berry Sauce
- Put raspberries in a small pot over medium heat.
- Squish them gently with a fork as they start to get juicy.
- Let them bubble for around 5-7 minutes, keep stirring often.
- You want it to cook down to half its size and stick to the back of a spoon.
- Let it cool all the way before using it – this stops it from melting your coconut layer.
- Making the Chewy Bottom
- Make sure your dates are super soft – dunk them in warm water if needed.
- Mix with nut butter and cocoa till smooth as silk.
- Throw in coconut oil at the end, just pulse a few times to mix it in.
- The mix should stick together when pressed but feel a bit sticky too.
- Put parchment in your pan with extra hanging over for easy lifting later.
- Creating the Coconut Middle
- Stir coconut with maple syrup and vanilla first.
- Carefully fold in your cooled raspberry sauce.
- Add coconut cream last, mixing until it's all pretty and pink.
- Press it down firmly on top of the brownie layer.
- Smooth the top with the back of a spoon or flat knife.
- Nailing the Chocolate Top
- Cut your chocolate into tiny, same-sized pieces so it melts evenly.
- Melt it with coconut oil using a bowl over hot water.
- Pour it over your chilled coconut layer while still runny.
- Tip the pan around gently to spread it everywhere.
- Sprinkle any toppings right away before the chocolate hardens.
Tasty Seasonal Tweaks
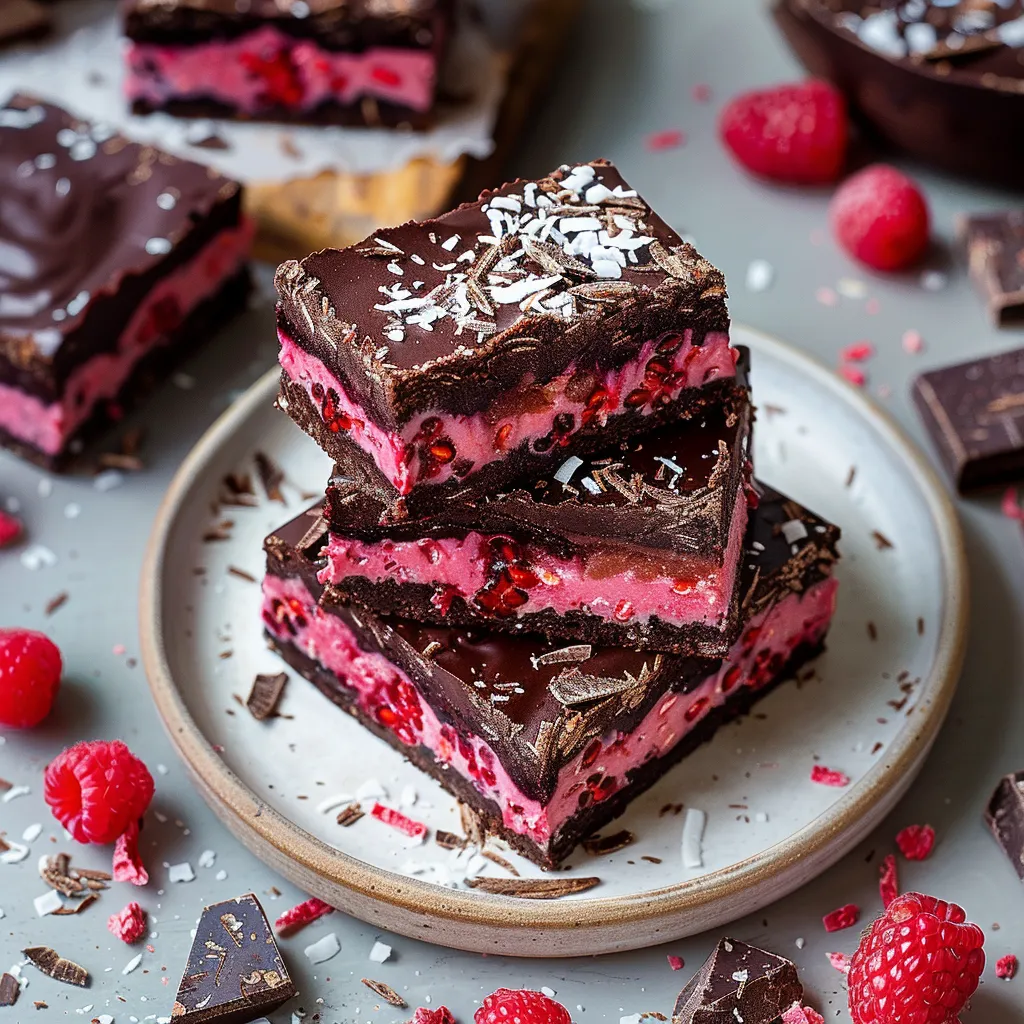
When berries are at their peak in summer, try mixing some whole fresh raspberries into the coconut part for extra juicy pops of flavor.
Perfect Present Wrapping
These treats make awesome gifts when wrapped in little parchment squares tied with string. I usually cook up twice as many during holiday time.
Pro Kitchen Secrets
- Use a Food Processor: It works way better than a blender for getting that perfect brownie base.
- Cool Each Layer Fully: This helps you get those sharp, distinct layers when cutting.
- Slice with a Warm Knife: Clean it between cuts for those magazine-worthy squares.
These stack-up bars show that plant-based sweets can be just as yummy as the regular kind. The blend of chocolate, raspberry, and coconut creates something that'll knock your socks off – a truly addictive treat that keeps its healthier secrets until you decide to spill the beans.
 Pin it
Frequently Asked Questions
- → Can I swap raspberries for other fruits?
- Absolutely! Strawberries or blackberries are great options, though the flavor will change a bit.
- → What can I use instead of coconut yogurt?
- You can sub it with coconut cream or any thick, plant-based yogurt you have on hand.
- → How long do these bars last?
- Store them in an airtight container in the fridge for 5-7 days, or freeze for up to a month.
- → Can I use dairy yogurt if not vegan?
- Sure! If you're not vegan, Greek yogurt is a great swap for coconut yogurt.
- → Any tips for cutting clean slices?
- Run a sharp knife under hot water, wipe it dry, then cut. Repeat between each slice for the cleanest results.